Roger Rasor, IPMS 34117
I built the Trumpeter 1/48 scale Supermarine Attacker F.1 for a kit review on the IPMS/USA website and was happy to have the opportunity. I have always though the aircraft was an interesting subject. It was one of those first generation jets that showed up in the aviation magazines when I was just beginning to pay attention to the array of aircraft that were replacing those that served in WWII. It also has been on my list of ‘someday projects’ for a few years, so the opportunity to build one for a kit review was something of a gift. And, when I surveyed the kit’s contents, it appeared to be an easier build than the other three that have been offered in 1/48 scale. I can personally attest to it being easier to build than the Classic Airframes kit because I started one of those five years ago and it is still in various stages of assembly (because the instructions guide you to install the intake splitters backwards early in the construction and it’s almost impossible to correct the error if you go much further…which I did!). Actually, that partially assembled CA kit would prove to be something of a blessing as I began building the Trumpeter kit. I’ll explain in a moment.
As I noted in my IPMS/USA review, it seems amazing to me that this actually is the fourth 1/48 scale plastic kit of the Supermarine Attacker F.1 (the others being Classic Airframes, Falcon and Magna Models)…along with a handful of 1/72 kits, the latest coming from AZ. Amazing because this aircraft’s single most significant reason for mention in the history of aviation is the fact that it was the Fleet Air Arm ‘s first jet fighter. That’s it…it was the first…nothing special other than that. It was not a particularly successful jet fighter either, but it was a significant first step in the Fleet Air Arm’s lethargic move into the jet age.
The Subject -
Conceived late in WW II, from a previous RAF jet fighter project, to satisfy Air Ministry Specification E.10 (1944), the Attacker was, in some ways, a jet version of the Supermarine Spiteful. It had a more portly fuselage and a jet turbine engine, but it shared the same wing and the same undercarrage…all the way down to its tail wheel stance. The Attacker’s development progressed at a slow pace. So slow in fact that the first test flight of this aircraft did not occur until June 1947, three years after the Gloster Meteor entered operational service with the RAF. And, the Attacker’s career was pretty brief. It entered first-line service with the FAA in 1951, was removed from that role in 1954, handed down to the Royal Naval Volunteer Reserve and taken out of service in early 1957.
The Attacker was delivered in two versions to the FAA, the F.1 Fighter and later a fighter/bomber version known as the FB.1. All total, Supermarine built and delivered 146 Attackers to the FAA. In addition, another 36 of a land-based export version of the FB.1, called the Type 538 Attacker (AKA FB.50), were transferred to the Pakistan Air Force in 1953.
Fortunately, one aircraft still exists today in the Fleet Air Arm museum in the UK and many photos of it can be found on the Internet (including walk around detail views) along with a number of period photos of aircraft in service that include some in carrier service. There are a couple of softbound books out there also, but they are not easily obtained.
The Kit -
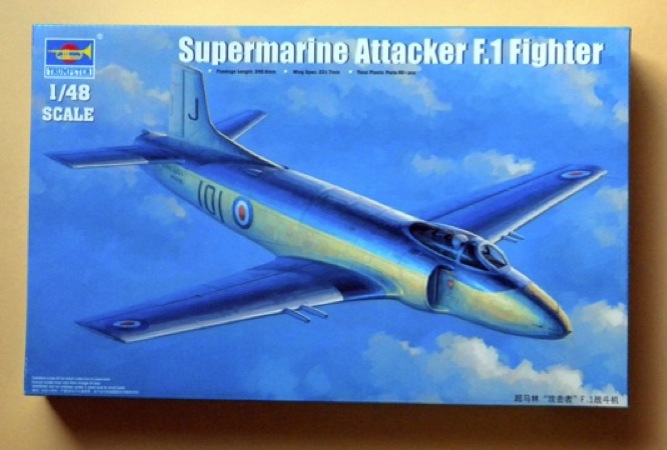
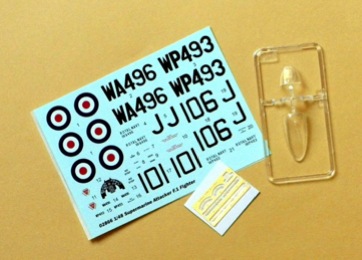
Trumpeter has done a very nice job with this one and modelers who want to build a 1/48 scale Supermarine Attacker now have a very pleasant way to go about it. The kit includes 81 gray injection molded parts on 3 sprues, 2 clear njection molded parts on one sprue, a small fret with nine p/e parts and decal markings for two aircraft. The parts exhibit delicate recessed panel lines and considerable surface detail.
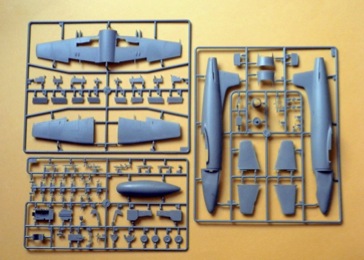
Overall, the parts fit well and panel lines align nicely. The gray plastic is a tad on the soft side, not unlike other Trumpeter kits, but friendly to the scriber and pin vice drill bits. That’s fortunate, because I decided to rescribe and redrill quite a few of the more subtle recessed details. Many of them are so subtle that they will likely disappear under even a light coat of paint. But, the fact that they are there at all is a tribute to Trumpeter, because the other kits do not (or did not) offer this level of surface detail.
The kit provides the parts necessary to build a model with the wing tips folded if the builder desires. It is an option, truly left up to the modeler because the wings are molded in the complete non-folded form with grooves on the inside of the top and bottom pieces indicating where to make cuts to separate the tips if they are to be folded. The sprues include fairly well detailed wing tip inserts and hinges to finish off the folded wing look nicely. The flaps are separate parts, so they can be placed in any position desired. The canopy is crystal clear and provided in two pieces so it may be modeled in the open position or closed position. The landing gear is nicely done and can be built either down or retracted (and, the hubs on the main wheel appear to be more accurate than the resin ones in the Classic Airframes kit). The photo-etch fret provides some seat belts, hardware for the nose tip and two flat strips that are intended to represent landing gear stabilization rods (I chose to replace them with actual rods cut from piano wire and used the p/e parts to fashion rudder peddle straps instead). Unfortunately, only parts for the shoulder belts are provided, and the instructions would have you attach them in the wrong way (They should be attached so the adjusting straps are on the front of the belts instead of the back side). The rather conspicuous belly tank that gave the Attacker a bulbous profile is provided. And finally, since the kit is intended to represent the fighter version, no wing ordinance is included.
Although the kit provides a number of mounting pins and holes to aid alignment of major parts, I added a few styrene blocks along the inside of the fuselage halves, as I usually do, to make for a stronger bond all around. While doing that that, I decided that some internal and external enhancements could be made to improve detail and accuracy.
The first enhancement almost seemed more like a necessity. In spite of all the delicate recessed details, I could not understand why Trumpeter did not mold the air intakes on either side of the fuselage as openings. They are blanked off and it just didn’t seem right to look into the intake inserts and see a wall of plastic.
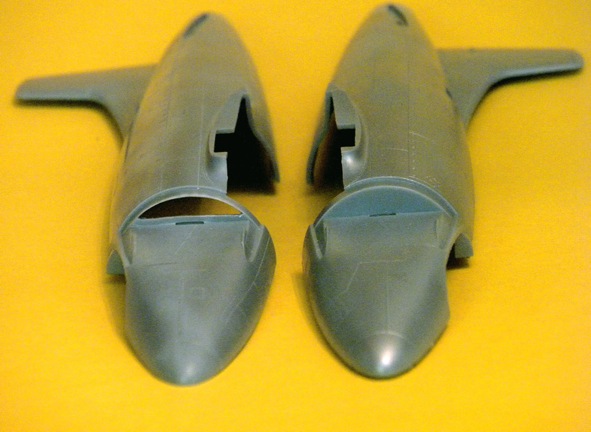
So I opened them up to enhance the appearance. I did it by drilling a series of small holes around the area to be removed, then I ‘connected the dots’ with a sharp #11 blade and carefully sanded the edges of the openings to smooth them out and conform to the insides of the intake inserts.
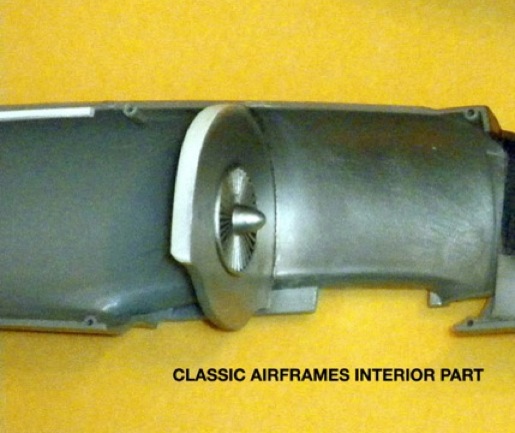
With the intakes now opened up, I then salvaged the interior fuselage part with the turbine face from the Classic Airframes kit and fitted it into the fuselage. It required a bit of test fitting and a little shimming with Evergreen styrene but it added some much needed detail inside that cavernous fuselage.
The next thing that I focused on was the way the cockpit sidewall ribs were represented in the cockpit. They were there, but too subtle in my opinion…so subtle that they tended to come and go. So, I enhanced them by adding some .020” square styrene stock on top of each of them, and trimming them to allow the cockpit tub to fit.
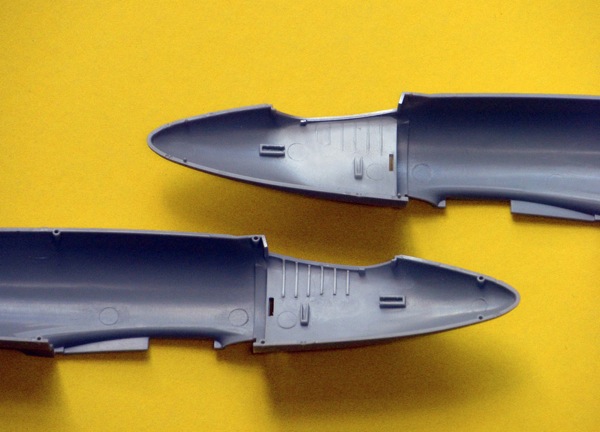
Later I added a few of the conspicuous sidewall details made from Evergreen styrene, some levers made from stretched sprue and a number of cables and some wiring bundles from some more sprue. I found a number of photos on the Internet to guide me, so it didn’t take all that long to make the cockpit look as busy as it should be.
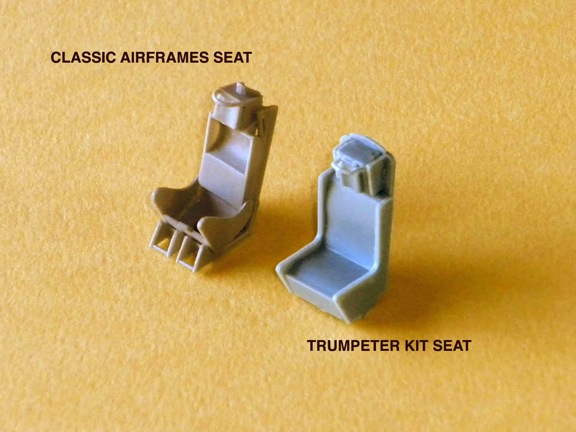
Among those photos were two of the Attacker’s ejection seat that helped me decide to forgo the rather wide Trumpeter multi-piece seat with one I robbed from the partially built Classic Airframes kit. The parts Trumpeter provides in the kit to build the ejection seat do have a number of details but they do not appear to be all that accurate and, when the parts are assembled the resulting seat has to be shoe horned into place in the cockpit tub (see the photo below).
It was necessary to sand off a little of the bottom of the Classic Airframes resin foot troughs to fit everything properly. While I was at it, I robbed the lap belts from the Classic Airframes p/e fret and added them since Trumpeter did not include any in the kit.
Then, instead of placing the decal Trumpeter includes for the instrument panel on the front of the molded panel, I sanded the backside of the part to thin it, drilled out the dial faces and attached the decal to a piece of .010” styrene that I then attached that to the back of the instrument panel with Future so the instrument faces appeared in the recesses. I applied a few more dollops of Future, followed by a couple more as each coat dried, to the instrument dials to provide ‘glass’ faces for each instrument. Then, instead of black, everything in the cockpit was given a coat of Gunze’s Dark Gray and details were picked out with various colors of Vallejo acrylics. Then details were given an oil wash and some highlights were dry brushed with WN oils or highlighted with Prismacolor pencil.
I assembled everything in the cockpit tub, placed the tub into the molded slots that properly align everything, inserted the tail pipe into the groove molded on the inside of each fuselage side, attached the tail wheel bay and closed up the fuselage halves. Everything came together well, and panel lines aligned perfectly.
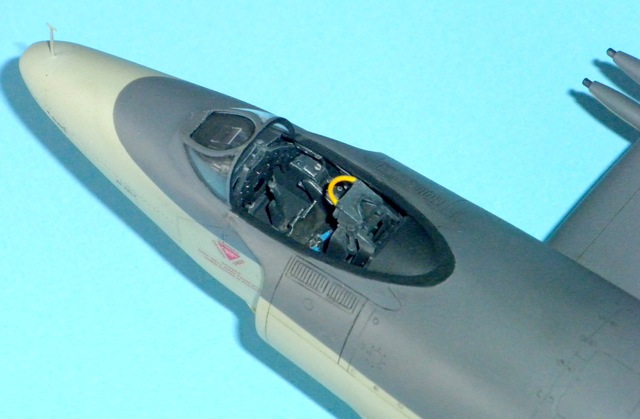
Enhanced cockpit details in completed model
The kit wheel bay inserts were rather simplified, so I scratch-built some lines, catapult hooks and a few other details in the kit wheel bay inserts before installing them (see photos of kit wheel well and detialed finished well below).
After they were in place, I taped the wing tops and bottom together to test the fit to the fuselage. That proved to be a fortunate move, because I discovered this kit’s only significant construction issue. The fit of the wing tops to the fuselage was so tight that the wings actually exhibited negative dihedral. So, before gluing the wing sections together, I sanded the wing root edges of each wing top piece enough to allow some dihedral to be reintroduced. Then the tops and bottoms of the wings were assembled and again the panel lines lined up and the fit was excellent. It was necessary to do a little shimming with scrap styrene around the top wing panel cutouts for the molded cannon fairings. After a little work with a #11 blade and some folded wet-dry sandpaper, they blended nicely.
After that, the wings fit so well they almost snapped into place when I introduced them to the fuselage, and no filler was required anywhere.
Attaching the tail feathers was much easier as Trumpeter provides mounting tabs on the stabilizers that are molded at the correct angle to guarantee a perfect dihedral...and they fit perfectly, again without the need of filler.
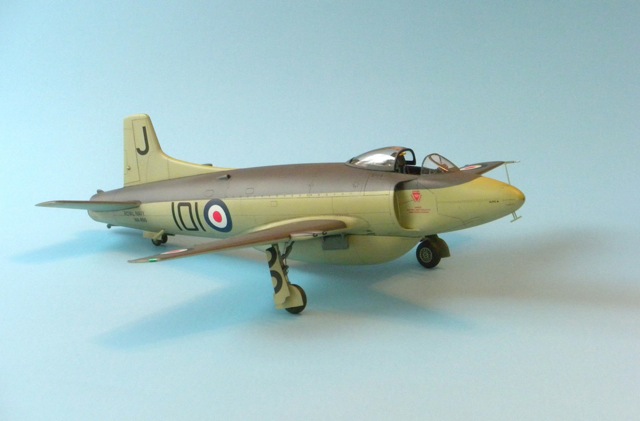
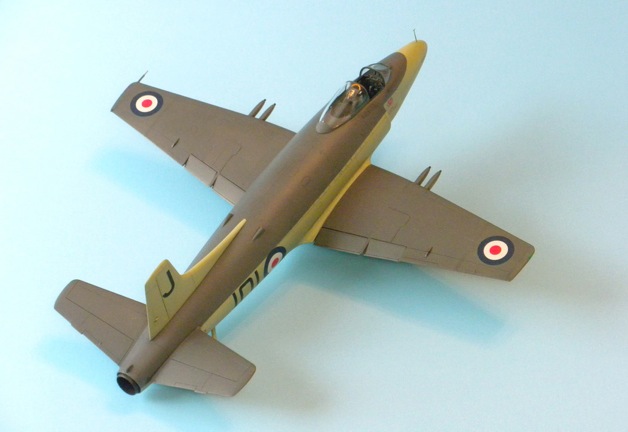
I added the gun site and windscreen, masked the windscreen and the open cockpit area, then give the model a light coat of Mr. Surfacer to check seams and panel lines. After rescribing a couple that I had missed, I polished the primed surface with a dry paper towel and airbrushed most of the model with Tamiya’s Sky (that I had mixed with a little Tamiya IJA gray to tone down what seemed to me to be a color that was a bit too green…almost matching the RAF’s 216 Eau-De-Nil). After that overall coat was allowed to dry, I masked off the Sky and sprayed the top surfaces with Dark Sea Gray. I then masked and painted the wheel bays. I chose aluminum as I believe that was correct for FAA aircraft at that time (although the lone survivor in the FAA museum appears to have been given a coat of gray green somewhere along the line.
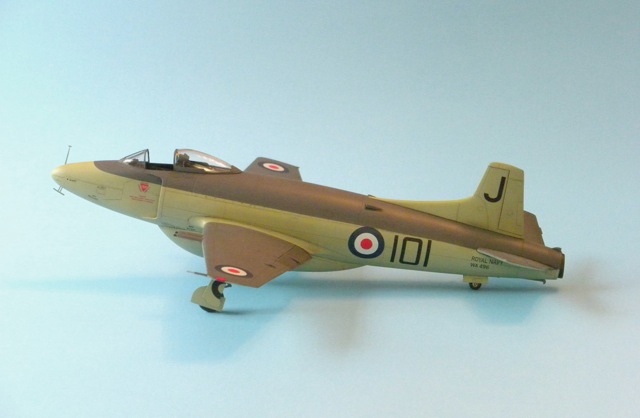
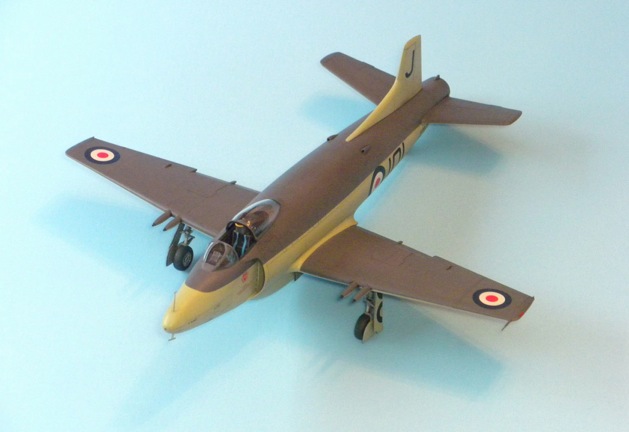
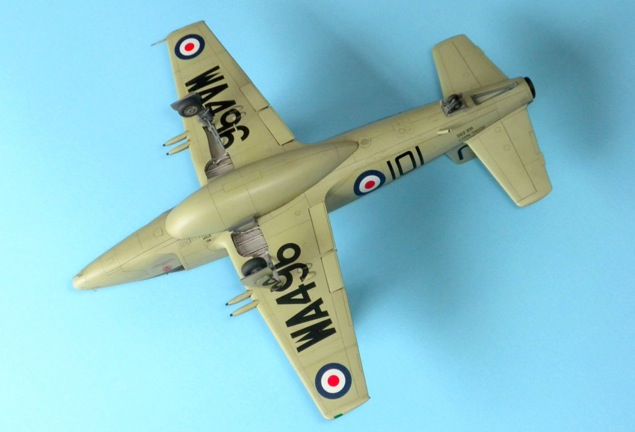
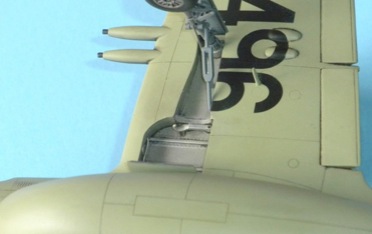
I am impressed with the way Trumpeter’s kit decals behave. They are easy to apply, adhere well, flatten out nicely and thin enough that they almost disappear when dry...especially under a coat of Future. And, it’s actually possible to get by without using a setting solution. However, I believe Trumpeter still has some problems sizing the markings on their decal sheets correctly. In the case of the Attacker, the aircraft numbers for the fuselage sides are slightly oversized…maybe 10%...but something I could live with. However, the under wing aircraft serials are at least 25% undersize when compared to photos of the actual aircraft in service. In real life, the serials were large enough that they continued over the landing gear doors.
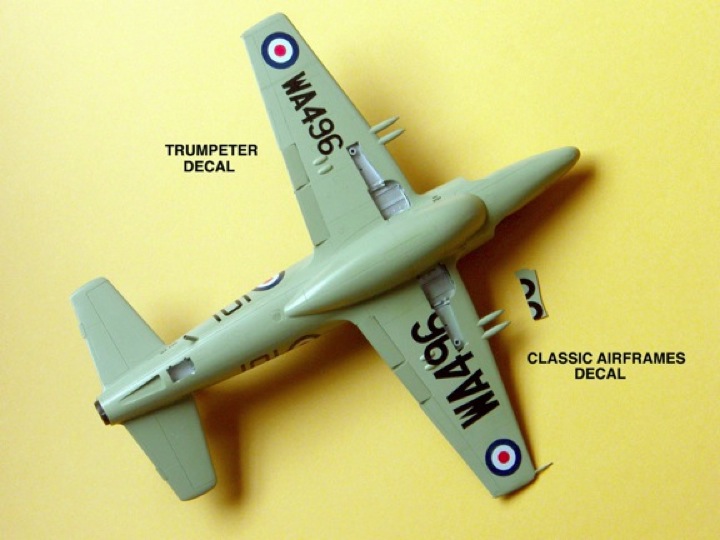
The ones on the sheet hardly make it far enough to reach the wheel bays. Unfortunately, I didn’t realize I had a problem until I had applied one of the kit decals.
So, once again I turned to the Classic Airframes kit for rescue, because fortunately the same aircraft markings are included on the decal sheet in that kit. See the photo that compares the undersized Trumpeter decal on the underside of the starboard wing vs. the one supplied in the Classic Airframes kit applied to the underside of the port wing (After taking the photo for the kit review, I replaced the undersized one).
The landing gear, tail wheel assembly, under wing antenna, gear doors, tail hook, pitot tubes, nose tip hardware and canopy frames were painted and everything was attached without difficulty. (Photos sourced on the Internet were very helpful in assembling the landing gear). Since the rear fuselage fuel dump pipe found on early aircraft was not provided in the kit, I robbed that piece from the slowly diminishing contents of that Classic Airframes kit and added it to the lower starboard side of the fuselage. Unfortunately Trumpeter, just like the other kit manufacturers, missed indicating the wing tip navigation lights. So, I lightly scribed them, masked off the respective areas and added them with a light spray of Alclad II Aluminum followed by a topcoat of Clear Red and Clear Green. Ironically, Trumpeter molded the tail navigation light into the little protrusion above the exhaust pipe. I painted it aluminum with a gloss clear topping.
In Conclusion -
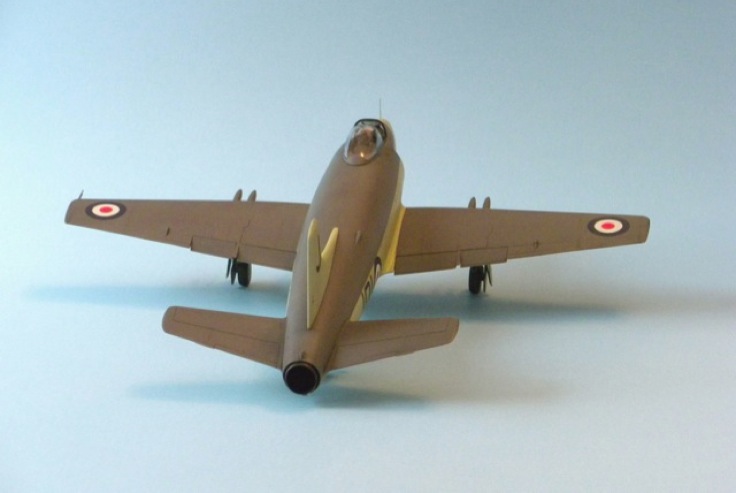
In my opinion this is a very welcome kit. With the exception of the negative dihedral issue, it was a pleasure to build and went together nicely. The enhancements I decided to add made the model a little more accurate, but the kit will produce a good-looking OOB model of a Supermarine Attacker that adequately captures the overall look of this early jet era tail dragger. If the inaccurate size of the aircraft serials is not of great concern, the decals are also very nice and go down well. And the MSRP of $38.99 is not out of line in today’s world for a kit that builds a 1/48 scale jet.
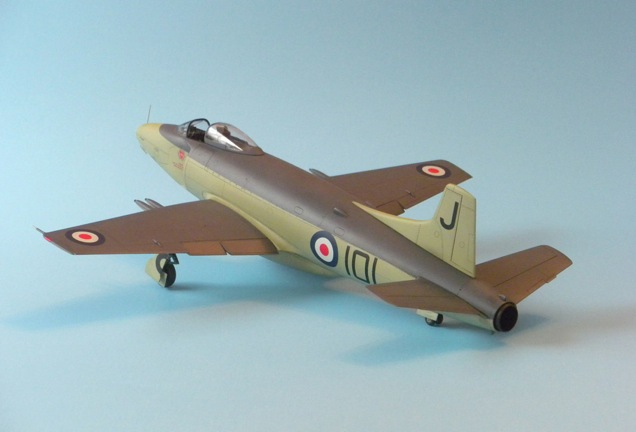
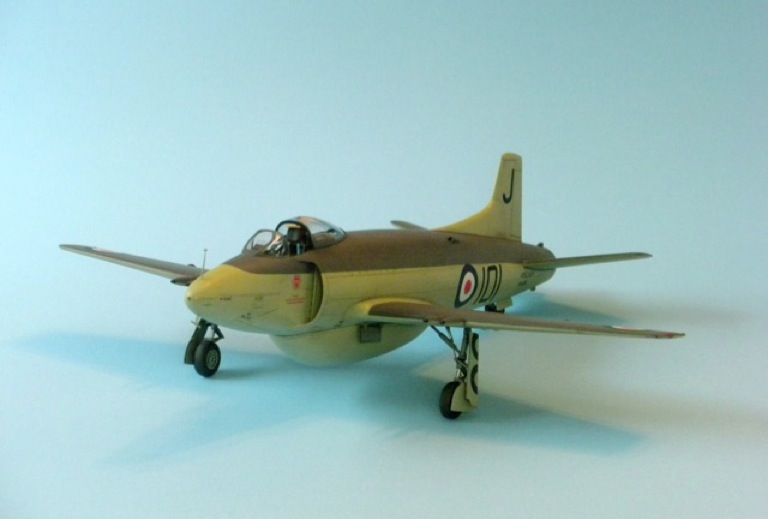
Although the Attacker may look a bit strange sitting there on its tail next to other jets, it was a significant aircraft and I think it looks fairly handsome in the FAA paint scheme of that era. Besides, it is a model of a jet you can build and not be concerned about adding weight to the nose.