

Getting the Most Out of the Messerschmitt Bf109E in 1/48 Scale
Bill Howell IPMS #12406
In this article, I will try to cover most of the major problems with the four main 1/48th scale kits of the Messerschmitt Bf109E. I will try to help with any fixes that I know of for these kits. I am not a Messerschmitt expert, but have built my fair share, so hopefully that will count for something. I was hoping that the Cyber Hobby kit was going to be out this year, but it was not to be. I will update the article once that kit comes out. I’m sure I will miss or leave out a small detail or problem, but hey… I’m lucky to make it to work most days! So, please feel free to let me know of any mistakes you may find.
I hope I have pointed out the problems and what you can do to correct them. There are tons and tons of PE, resin and decals for the Messerschmitt Bf109E on the market so if you want to add PE or resin, go for it. A lot of folks are content with just adding an aftermarket resin seat. There are many to chose from, however I don’t recommend the Ultracast seat as I believe it is a poor representation of the seat in the Bf109E.
Airfix

The kit comes as a Bf109E-1/E-3/E-4, Bf109E-4/E-7 Trop or the Airfix Club version.
This kit is spot-on with the AeroDetail scale plans. The recessed panel lines are a bit heavy on this kit but light sanding and some paint will take care of that. There are ejector pin marks on the inside of the upper wings that make up the wheel wells, so you’ll need to fix these before you glue the wings together. If you don’t, they will be a pain in the butt to fix. You can just fill the ejector pin marks with super glue and sand them out. There are some very slight sink marks under the cockpit on both sides, which will show if they aren’t fixed. The kit can be built with the gear up or down. The slats, flaps and all controls are separate pieces. Another problem is that the canopy has two small tabs that fit just like the one on the Tamiya kit. Just remove the tabs and fill the slots. The fuselage and cockpit remind me of the Tamiya kit in some ways. You can build this with the cowling open or closed. The engine is not as nice as the one in the Tamiya kit, but mine looks really nice with the cowling closed.
How to improve your Airfix kit…
The Good
The dimensions are right on the money and the outline looks just like a Messerschmitt.
The Bad
The 109E-1/E-3 canopies look o.k., but I’m going to replace mine with a vacuform or the leftover canopy from the Zevezda Bf109F-2 kit. The center canopy of the E-4/E-7 Trop needs to be replaced, as it looks like it should be on a Bf109G. The Galland version is a joke. If you want to do the Galland version with the scope, just use the Hasegawa Galland or the Eduard Bf109E-4 Profi-Pack kit, as it has the decals and clear parts for his 109.
Can you replace the cockpit? (I don’t know if anyone makes one for this kit yet). The SBS cockpit might fit, but I have not tried it yet.
The wheels and tires should be replaced with the Eduard Brassin set. (These are the best wheels and tires out there for the 109E).
The guns need to be replaced with Quickboost or Master Barrels or any after market set you want to use.
The exhaust needs to be replaced with Quickboost.
The head armor needs to be replaced with a spare from the Zvezda Bf109F-2 kit.
If you are doing a Jabo, the bomb rack needs to be replaced with the one from Verlinden #321 Underwing Stores, (which is really nice), or you could rob one from your parts box.
The Ugly
The props and spinner need to be replaced with Ultracast. (And I thought the Tamiya props were skinny)!
The seat needs to be replaced. I’m going to use the Cutting Edge seat, (which is getting hard to find). You can replace the seat with any after market seat of your choice; just don’t use the Ultracast.
The landing gear legs are too long with the oleos being in the fully extended position. This has to be fixed or the model will sit nose high. You can either fix this, or replace the landing gear with the set from a Tamiya kit. You can also use the Tamiya gear covers. That’s what I’m going to do with mine.
Decals will need to be replaced with after market decals. The Airfix decals suck! (Well, they do).
Fill in the wing tip lights and add new ones.
Add some brake lines to the main gear legs.
You will need to add a fuel line to the cockpit if you are doing a Bf109E-7. This holds true for all of the kits.
Also, a drop tank will need to be added. The Bf109E-7 was the first production Bf109 to carry a drop tank. Add a Verlinden or any after market set you want. There is a lot of resin out there. I know this seems like a lot of things to fix, but they are all minor. This will build up to a very nice Messerschmitt Bf109E.
Hasegawa
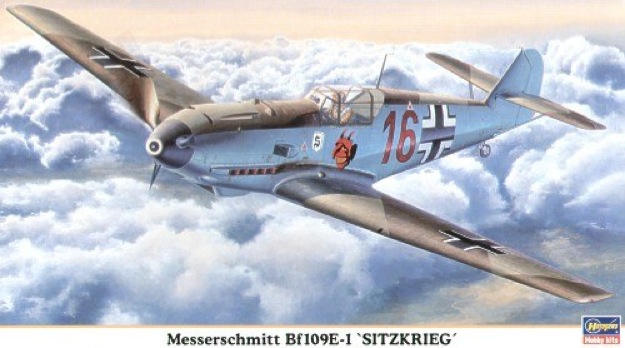
Bf109E-1, Bf109E-3, Bf109E-4 and a Bf109E-4/E-7 Trop
This is the oldest kit here and I still like it, but it is getting kinda long in the tooth. But, aren’t we all? The kit is right on the money for the dimensions. This and the Airfix kit looked really good next to the Aero Detail plans. The detail on this kit is not as good as the Tamiya or Eduard kits, but then, this kit was released in the mid to late 1980s. So, in short, it is old! That’s good, because you can get them at model shows for $10.00 or less. The Hasegawa kits were redone after the “J4” series of kits, so if you are going to buy this kit, get the kits that are marked “Jt08” or later. These had the better fuselage, cowling and canopies. To be honest though, most folks can’t tell the difference.
If you want to build a Bf109E-1, pass on the Hasegawa Bf109E-1 kit, as it is more of a conversion than a kit. If you have it in your stash though, then build away. If not, then build the Airfix kit. It will be a lot easier build. Trust me!
How to improve your Hasegawa kit.
The Good
The canopies are nice, thin and very clear.
The prop and spinner are better than most, but I’m going to replace mine with after market.
The kit has PE screens for the radiators, oil cooler and head armor.
The Bad
The old Hasegawa kit decals suck and so do these. Replace with any after market set you want. If you have to use the kit decals, be sure to use very hot water.
The cockpit could be better, so replace it or the seat. A good replacement for the cockpit would be SBS. Also, a Cutting Edge seat would be right at home here, or use any after market cockpit set that you like.
If you’re doing a Jabo, replace the bomb rack and bomb with the very nice Verlinden rack and bomb, or any after market resin set you have or like.
The Ugly
Replace the guns with Quick Boost or Master barrels.
The wheels are the worst part of this kit. Replace them with the very nice Eduard Brassin wheels and tires. Do this on all your Messerschmitts – (sweet) – or use your leftover tires and wheels from the Eduard kit.
Add some brake lines and that should get you there. There are plenty of after market Photo Etch and resin parts out there for the Bf109E. Just use some PE parts here and there to update the detail and it will still look like a winner. This kit will build into a very nice Messerschmitt Bf109E and you won’t go broke doing it.
Tamiya

Kits: Messerschmitt Bf109E-3 and Messerschmitt Bf109E-4/7 Trop
The Tamiya kit has been the best Bf109E for many years now. The kit was done in the 1990s and is a little better than the Hasegawa kit. The kit does have better detail than the Hasegawa kit. The kit is also a tad short in the nose. I used the Aero Detail plans. If you have this kit in your stash, just build it. It’s not that bad – or you can send yours to me. Tamiya did almost the same thing that Hasegawa did on their kits. The kit had to be redone because the nose profile was off. So if your kit says it was made in “Japan”, you have the old kit. If it says “Made in the Philippines”, you’re good to go. Or just build it, because no one is going to look that close anyway.
To improve and update the Tamiya kit.
The Good
Canopies are very thin and nice.
The Bad
The cockpit could be replaced with an after market set, or you can just replace the seat.
Cutting Edge or SBS seats come to mind; just don’t use the Ultra cast seat. Also, if you just replace the seat, fill the slots for the canopy tabs in the cockpit. You will need to remove the tabs from the canopy, as the Bf109E does not have these tabs.
The exhaust needs to be replaced with the Quick Boost set, or any after market set you want to use.
Replace the guns with Quick Boost or a Master Barrels set.
The bomb rack is not all that bad, but I would replace it with the Verlinden set, (if you are doing a Jabo), or any other after market set you might want to use.
You will need to add a fuel line to the cockpit for the drop tank if you are going to do a Bf109E-7. All Bf109Es had this fuel line if they had a drop tank.
The decals were nice and thin, but mine were out of register. Use any after market decal markings you want.
Add some brake lines. This still builds into a very nice kit and will look good when you’re finished with it.
The Ugly
The only thing that gets to me about this kit is that it has some very bad sink marks on the side of the fuselage under the cockpit on both sides and both upper wings that you will have to fill with super glue or putty. Tamiya should have fixed this.
Both these and the Airfix kit have props that are too skinny. Replace with the Ultra cast props and spinners, or any after market set you want to use.
Replace the wheels and tires with the Eduard Brassin set. These are the very best in this scale for the Bf109E. Do this on all of your Messerschmitts.
This has to be the worst tail wheel on any Messerschmitt that I have ever seen. Well, o.k., the one on the old Starfix 109 kit might have been just as bad. So use the one from the Eduard set, or use one from an old Hasegawa kit.
Hobby Craft
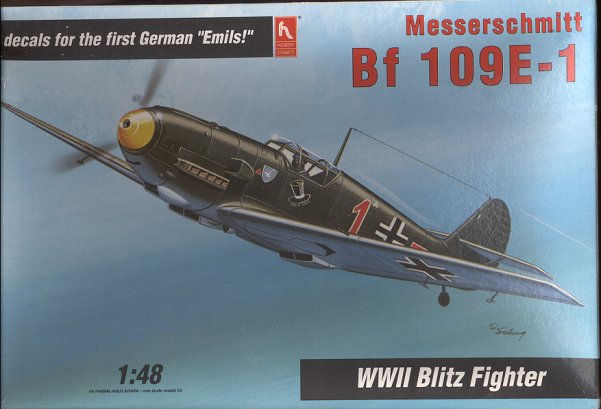
This kit is kind of a copy of the Hasegawa kit. I don’t remember when these kits came out, but I think it was in the early 1990s. There are some things that are different, but for the most part, it is the Hasegawa kit. I’ve got to say I’d just build the Hasegawa kit. They are very affordable and are just better kits.
Eduard

When this kit hit the street, we all knew that we should have the best Bf109E on the market. Well, you know how things go. After looking the kit over, it is a very nice kit with lots of color photo-etch parts. There are also lots of very nice, detailed parts with a great looking engine and cockpit. The panel lines are very nice, but there are two major problems with the kit: It is close to 4mm too long in the rear fuselage. (I used the Aero Detail plans for all of these kits and this is the worst of any of them). There is also a problem with the leading edge slats. They seem over size to me. The Airfix, Tamiya and Hasegawa slats look better. Will this Bf109E look good when you have finished it? Yes, it will look good, but it will still be too long in the rear fuselage. When all of the kits are placed next to each other, it is easy to see just how bad this fuselage is. We all know that the Tamiya kit is a little short in the nose, but this fuselage makes the Tamiya kit look really good. This I will leave up to you: Can you live with it? The fit of the kit is very good, even if it is just a little fiddly. Overall, this is the best kit package of the Bf109E in 1/48 scale, with lots of plastic and photo-etch for your money.
The Good
The decals are the best of any 109E kit on the market.
This is the best detailed Messerschmitt Bf109 kit on the market in 1/48 scale.
This is the best out of the box cockpit in a 109E on the market.
The canopies are very thin and clear, and are the best canopies of the Bf109E kits on the market today.
The landing gear legs look good with nice gear covers and there is no need to replace them.
Yep, the wheels and tires are very nice, but Eduard has come out with an even better set of wheels and tires in their Brassin set. These are just sweet. Replace the kit wheels with these and use the kit wheels and tires on one of your other kits, (like the Hasegawa).
The exhausts are very nice and there is no need to open or replace them.
The props and spinners are the best yet.
The guns are the best of any of the kits and they don’t need to be drilled out. If you replace them, I suggest using the Master Barrels.
The Bad
The seat is not that bad, but it could be better. The Cutting Edge seat would look really nice in this kit, or you could give the SBS seat a try.
The Ugly
The leading edge slats are a problem with this kit that I don’t know how to fix.
The fuselage is almost 4mm too long. This seems to be behind the cockpit and I don’t know of an easy fix for this. Come to think of it, I don’t know of a hard way to fix these problems either.
You can build this kit opened to show the engine and guns, or you can close it. If you build it opened up, it will just fall together because this is the way the kit is supposed to be built. To build it closed will take a little doing, but it’s not that complicated.
The Eduard Weekend kit instructions for the Bf109E-1 show how this is done better than the ProfiPack instructions for the Bf109E-1. It looks as though improvements were made to the ProfiPack Bf109E-4 instructions. If you close it up, don’t use the engine mounts, remove a small part from the front of the engine, and remove some of the MG mounts and you’re good to go. Just dry fit it as you go and you won’t have any problems. If you don’t, the cowlings and side panels won’t fit. Trust me on this. If you want to see just how bad it can be, go over to the Modeling Madness site and see the guy’s build of his Bf109E-1(http://modelingmadness.com/scott/axis/luft/me/109/48e1.htm). I think his review might have made them update their plans on the Bf109E-4 Profi-Pack kits.
This is a very nice kit, (if you don’t mind the fuselage being too long and the wing slats being oversized). This kind of thing is what keeps this from being a fantastic kit. I had hoped that Cyber Hobby would have their 1/48 Bf109E out by now. Oh, by the way, you can thank me though, because the Cyber Hobby kit will come out now that I have finished this article. I just hope they get it right. To be honest, if you want to do one of the best looking Bf109Es in 1/48 scale, fix the small problems with the Airfix kit and you’re there. We have come a long way from the old Monogram kit days.
I hope this information will help in choosing a 1/48 Bf109E kit and with your next build.